|
Instructions:

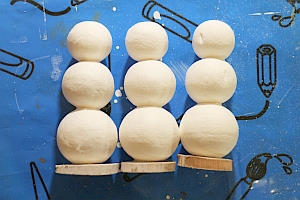
1. First hot glue the pressed paper balls onto each other starting small for the head and the largest at the bottom. Then hot glue each snowman body to a wood slice. (You can also paint this white if you like)
2. Then brush on a thin yet even coat of textured snow paste on each snowman and let this dry before continuing.
3. Use the marker to draw on the eyes, mouth and buttons. The eyes and buttons are larger dots and the mouth are tiny dots like the snowman is smiling.
4. Use the cotton swab and add just a little red paint to it and brush off any paint that may be too much. Then slightly blush the cheeks of the snowman.
5. Snip an end off of a tooth pick and paint it orange. Use a pointed object such as a knitting needle or small screwdriver to make a hole through the pressed paper.
6. Once the paint is dry, then insert the “nose” into the hole. The pressed paper holds the toothpick end well but you can use glue to glue it in if you want to be sure.
7. Cut a piece of knitted tube to a length you like. Roll up one end like you would for a beanie cap. Tie off the other end with a piece of string so it will not fray any further. Hot glue the rolled end to the snowman head.
8. Tie a piece of baker’s twine around the neck to look like a scarf.
|