Christmas Projects - Christmas Crafts for all Ages


Faux Chalkboard Christmas Sign

If you love the look of chalkboards but drawing anything on them intimidates you, then this craft project could be a great alternative. You can make these as big or as small as you like. For this project, we used stretched canvas but a wooden board can be used just as well.

Another advantage is that this sign is permanent and can be hung every Christmas for years to come.

Consider letting kids make one using white Christmas shapes that they cut out and paste onto their own painted board.

Faux Chalkboard Christmas Sign


Time required For This Sign: Cutting and arranging the pieces - about an hour, painting the board and gluing the pieces on about 2 hours due to drying time

Difficulty Level: Easy

Material List For This Sign:

- stretched canvas in a size you like (here the canvas measured 30 x 45 centimeters, but you can create much
  smaller signs if you like)
- black acrylic paint and paint brush
- decoupage glue or Mod Podge
- Christmas dies and die cutting machine of choice or electric cutting machines like Sizzix E-Clips, Cricut, etc... Also
  paper punches can be used for the smaller shapes like stars...
- ...or i
f you do not have a die cutting machine and dies, you can purchase white Christmas stickers or even use
  Christmas stencils with white paint instead. On our sister website Craftideas.info, you can also find basic
  Christmas shapes
here, as well.

E-Clips Die Cutting Machine from SizzixFor this project most of the die cut images were created using the Sizzix E-Clips machine and the cartridge “Christmas Traditions”. The advantage of such a machine is that you can change the size of the images you want to use to adjust to the canvas size you are using. This is not an advertisement for Sizzix. It just happens to be a machine we have and used.

The delicate corner pieces were found in another E-Clips cartridge and the small stars were created by a star punch.

You are not limited to any certain machine or dies. Use the machines and dies you have and combine the images until you have a pleasing result.

Instructions:

Painting the Canvas
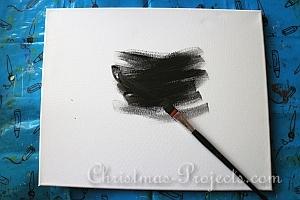
1. Paint two coats of paint on the canvas, letting the paint dry in between coats.
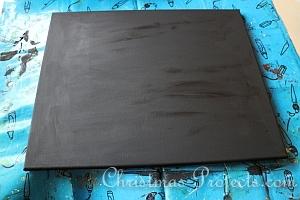
Let Canvas Fully Dry
2. Make sure to also paint the sides of the canvas as well.
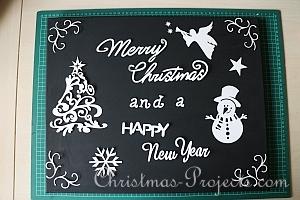
Arrange The Images
3. Cut and arrange the pieces you wish to use on your sign before gluing them on. It helps to play around a little bit until you find a solution that works for you.
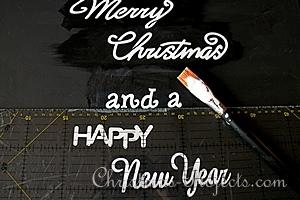
Using a Ruler Helps Getting the Words Straight
4. When gluing the pieces on, first add glue to the canvas with the brush and then press the image onto the glue. Brush a coat of glue over the image to seal it. When gluing on the words, it helps to use a quilter’s ruler or similar to get the words straight.

5. Once you have glued all of the pieces on, let the sign first dry. Then add another coat of decoupage glue on top of the whole canvas to seal the images and also to give the sign a nice and even coat.


Home

Advent Calendars

Angels

Basic Christmas Crafts

Christmas Around the World

Christmas Cards

Christmas Carols

Christmas Coloring Book Pages

Christmas Freebies

Christmas Games and Puzzles

Christmas in Germany

Christmas Recipes

Christmas Stories and Poems

Christmas Trees

Crochet and Knitting

Cross Stitch Crafts

Decorating Ideas

Fabric Crafts

Floral Craft Ideas

German Christmas Crafts

Gift Wrapping Ideas

Gingerbread Men

Handmade Gifts to Craft and Sew

Kids Christmas Crafts

Paper Crafts

Patchwork & Quilting

Reindeer Crafts

Santa Crafts

Scrapbook Layouts

Snowflakes

Snowman Crafts

Stars

Stockings

Tags

Tree Ornaments

Wood Crafts

Wreaths


Copyright: If you would like to share Christmas-Projects.com crafts or recipes, please read here before doing so.


Contact           Links           Disclaimer

© Christmas-Projects.com